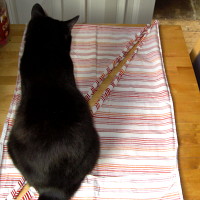
 STEP 1
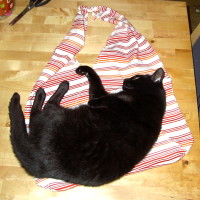
Take an old pillowcase, or in my case an new-to-me-but-old pillowcase, purchased for a very cheap price from a local charity shop. Get a cat (in this case Sili) to inspect it for quality and cleanliness.
STEP 2
See this picture of a pillowcase shopping bag on the internetz.
STEP 3
Find the instructions the red bag lady used to make hers.
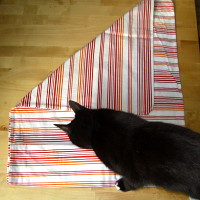
 STEP 4
As directed, fold in half along the diagonal, pin and cut. Do a better job than I did then have a cat expect your handy work. If you didn’t do a better job than I did, expect the cat to stalk off in disgust (a la Carbon).
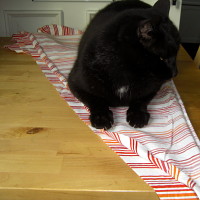
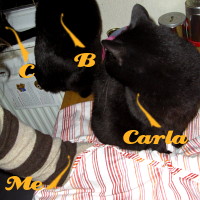
 STEP 5
Turn the pieces inside out (everything is pretty much done on the wrong side from here on in) then ask the nearest cat (still Carbon) to help fold and pin all the diagonals for hemming. You may think the cat is in the way but you are wrong: they’re making sure you don’t get too over-eager with the folding and that you listen to Martha and fold it in twice, about 5mm a time. Cats are stickler for detail and have claws to make sure you follow their instructions, even when they’re so disgusted with your efforts that they can barely look at you.
STEP 5a
Brief pause for a quick tickle with Carbon because, let’s face it, you’re not going to get any more work done while he’s in this mood.
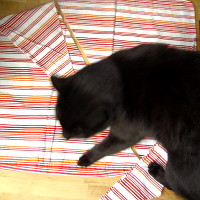
 STEP 6
When it’s all pinned up and ready to hem, have the hem inspecting cat (Carla) check over your work. If she approves, she’ll approach you for a congratulatory nose rub.
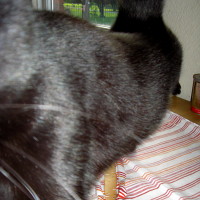
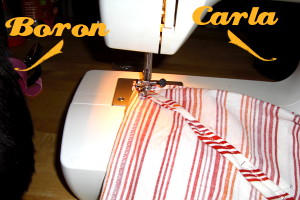
STEP 7
Hem away! Have a cat sat on your knee – between you and the machine – to keep an eye on the proceedings. For this step, I used a combination of Carbon and Boron.
 STEP 8
Slip one of the hemmed triangles inside the other to form the basic shape of the bag. Pin it into place. Don’t forget: pins are sharp and can be dangerous, remember to ask a cat to supervise you to make sure you don’t hurt yourself. In fact, make sure you have a couple of back-up cats as well as the main supervisory cat in case of emergencies.
STEP 9
Sew along the diagonals where the fabric overlaps. Martha and the red bag lady seem to have only done the outside flap but I did the inside ones too, to make the inside neater (less likely for things to get caught up) and hopefully make it generally stronger too. Your cat may have a particular preference about this so don’t forget to ask.
 STEP 10
Since this is such a critical step, two cats are required to inspect the work independently – in this case, Boron and Carla were drafted in.
STEP 11
Sew along the bottom edge – nice and strong. I also hemmed a triangle at the corners to make them more rounded when turned the right way around. Speaking of which…
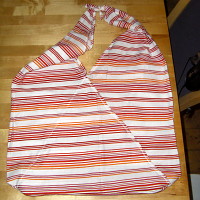
 STEP 12
Turn it the right way out, tie a knot in the narrow straps at the top – et voila! Get a cat to check it for comfort value then hold said cat in a grapple hold in order to take a cat-free photo of the finished artefact. Put the cat down again and enjoying the purring.
The pillow case seemed to be a bit longer than normal so the “straps” are really pleasantly long – imho much better as a shoulder bag than Martha’s version. It’s pretty big too and easily holds my brand spanking new laptop (in the padded slip carry-case thing it came with), and the related bulky paraphernalia (power supply, mouse, headphones…). It’ll be great for swimming and/or shopping too because unlike most tote bags, the strap is pretty broad so won’t go like cheese wire when carry more than helium balloons.
Next time the cats are available to help, I might add an outside pocket or two for things like my keys (the pillowcase was one of a pair, but I might use some orange felt I’ve got instead) or some fun over-sized buttons or something for decoration.
TOTAL PROJECT TIME: about three and a half hours including cat stroking, a cake-break and an episode of ‘Star Trek: The Next Generation’ (wasn’t a good one; Riker made it with a hot alien chick).
MATERIALS & EQUIPMENT:
- 1 x pillowcase
- cotton/thread for sewing
- Additional decorations as desired
- Scissors/pinking shears
- Pins
- Sewing machine (or a trusty needle and a whole lot of time)
TOTAL CATS REQUIRED: four.
29/9/2010 at 12:45 pm
Love your sense of humour .. I love the bit about you sewing with a cat on your lap – I too have often sewed/typed with a cat on my lap – not convenient but somehow lovely anyhow. I love the idea of making the bag from a pillow case. I have made loads of bags from old T-shirts which are great but I think the pillow case one will be stronger.
Thanks very much for the info.